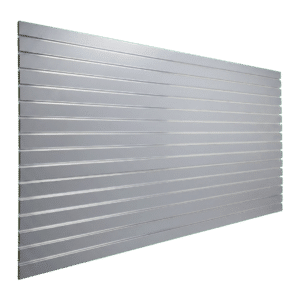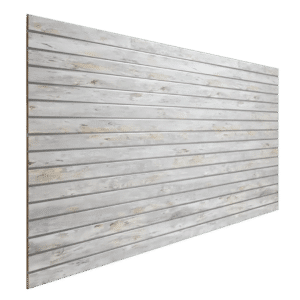
Ever wonder how some stores just get it when it comes to displaying their stuff? They make everything look neat, organized, and super easy to browse. A big secret behind that magic is often something called slatwall. Think of it as a super flexible wall system with grooves that let you hang all sorts of things – shelves, hooks, bins, you name it! It’s awesome for showing off everything from clothes and accessories to gadgets and home decor. The best part? You can easily move things around whenever you want, whether you’re bringing in new products, getting ready for a holiday sale, or just want to refresh your look. This makes slatwall a must-have for any store that wants to look great and work efficiently.
Slatwall isn’t just a passing fad; it’s a smart choice for business owners and store managers because it really delivers. Unlike old-fashioned, bulky shelves, slatwall helps you use every bit of your wall space, turning empty walls into powerful selling zones. This is a huge win, especially for smaller shops or city stores where every square inch counts. It lets you show off more products without making your store feel cramped or messy. Plus, beyond being super practical, slatwall gives your store a clean, modern, and professional vibe, making shopping a much nicer experience for your customers.
For over 40 years, DISPLAYARAMA has been a top name in retail display solutions. We’ve built our reputation on providing excellent, reliable products. All that experience means we really know what stores need, and we’ve made sure our products keep up with what’s new and popular. We believe that helping you understand how to use our products is just as important as selling them. That’s why DISPLAYARAMA offers easy-to-follow guides and tutorials. Even if you’ve never installed anything like this before, we’ll help you get professional results. When you choose DISPLAYARAMA, you’re not just buying slatwall panels and store fixtures; you’re getting a partner who’s committed to helping you succeed. We give you the tools and know-how to turn your store into a beautiful and super functional place where customers love to shop.
Why Choose Slatwall for Your Retail Store?
So, why is slatwall such a big deal in retail? It’s not just a random trend; it’s super popular because it offers a ton of benefits that old-school display systems just can’t match. Once you get why it’s so great, you’ll see that slatwall isn’t just a way to show off products – it’s a smart move for making your store run better and look awesome.
First off, slatwall is a champ at making the most of your display space. In a retail store, every bit of wall can be a chance to make a sale. Slatwall panels have these special grooves that let you use your walls from top to bottom, turning plain walls into exciting places to show off your goods. This is a huge plus for smaller shops where floor space is tight. You can display more products without making your aisles feel cramped or hard to walk through. By drawing people’s eyes up, slatwall makes your store feel bigger and helps more people see what you’re selling.
Next, slatwall is incredibly easy to change up. The cool thing about slatwall is how flexible it is. Those horizontal grooves are made to hold all sorts of accessories – hooks, shelves, bins, and special displays. This means you can quickly and easily switch up how your products are arranged. Want to highlight new arrivals? Got a big sale coming up? Slatwall lets you rearrange things without needing special tools or a professional. This flexibility keeps your store looking fresh and exciting for your customers. Whether you need to go from hanging clothes to showing off boxed items, slatwall makes it super simple.
Third, DISPLAYARAMA’s slatwall panels are known for being super tough and long-lasting. We make our slatwall from high-quality materials, so it’s built to handle the daily hustle and bustle of a busy store. It won’t wear out easily, meaning your displays will keep looking sharp and professional for years. This durability means you won’t have to keep buying new fixtures, which saves you money in the long run. Our commitment to quality means you can trust that your slatwall will always be there to support your products, even the heavy ones.
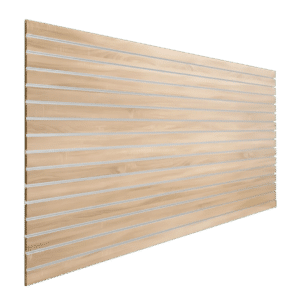
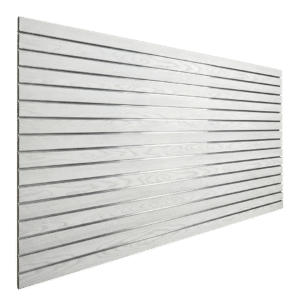
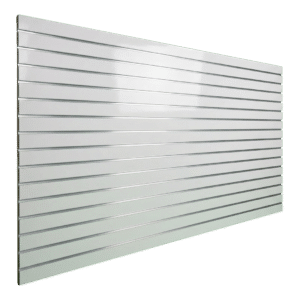
Finally, slatwall just looks really good. A well-designed slatwall system can totally upgrade the look of your store, making it feel modern, tidy, and welcoming. We have slatwall in lots of different finishes and colors, so it can easily fit in with your store’s style and brand. Its clean and simple look lets your products be the stars, making them seem more valuable and grabbing customer attention. A good-looking store makes customers want to stay longer, explore more, and ultimately, buy more stuff.
Need Quality Slatwall for Your Store? Shop Slatwall Now

What You’ll Need for Slatwall Installation
Before you jump into putting up your slatwall, it’s super important to get all your tools and materials ready. Being prepared makes the whole job much smoother and helps you get a strong, professional-looking finish. While DISPLAYARAMA is your go-to for awesome slatwall panels and accessories, we don’t actually sell tools. But don’t worry, we can definitely tell you what you’ll need to get the job done right!
Tools You’ll Need (Just a heads-up: DISPLAYARAMA doesn’t sell these):
•Measuring tape: You’ll need this to get accurate sizes for your walls and your slatwall panels.
•Level: This is key to making sure your slatwall panels are perfectly straight and even. No crooked displays here!
•Stud finder: Super important for finding the wooden studs inside your walls. These are the strongest spots to attach your slatwall for the best support.
•Drill and drill bits: You’ll use these to make holes in your slatwall panels and the wall itself, especially if you’re drilling into tough stuff like concrete or brick.
•Screws and anchors: The kind you need will depend on what your walls are made of (like wood studs, drywall, or concrete). Always pick screws that are long enough to go deep into the wall and hold tight to the studs or anchors.
•Saw (if you need to cut): A circular saw or a jigsaw with a fine blade is best if you have to trim your slatwall panels to fit certain spots or go around things like outlets.
•Safety gear: Always put safety first! This means wearing safety glasses to protect your eyes, gloves to keep your hands safe from cuts, and a dust mask, especially when you’re cutting panels.
Materials You’ll Need:
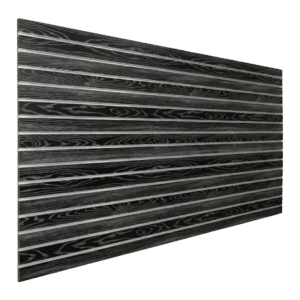
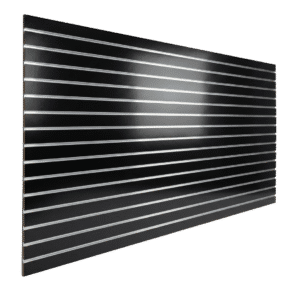
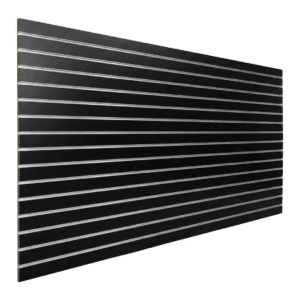
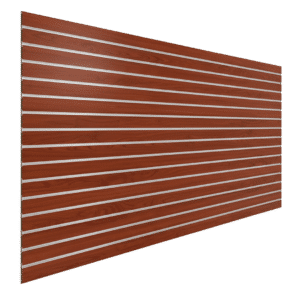
•Slatwall panels from DISPLAYARAMA: These are the main pieces of your display system. Make sure you have enough to cover the wall area you want, and maybe a little extra just in case you make a mistake or need to cut some pieces.
•Moldings and connectors: These pieces help make your slatwall look seamless and finished. They cover the edges and help connect panels together.
•Optional: Slatwall accessories: This is where the fun begins! Think hooks, shelves, bins, and other cool display parts that let you customize how you show off your products. Consider what you’ll be selling to pick the best accessories.
How Many People You’ll Need:
While you might be able to do some smaller installations by yourself, having an extra set of hands can make a huge difference. Slatwall panels can be heavy and a bit awkward, so having help makes lining them up and securing them much easier.
•For small to medium jobs: We suggest 1-2 people. This way, one person can hold and line up the panels while the other screws them in, making sure everything is precise and nobody gets too tired.
•For big spaces or lots of installation: A team of 2-3 people is perfect for getting the job done quickly. This lets you split up tasks like measuring, cutting, and installing, which can really speed things up.
Having the right tools, materials, and enough help will make your slatwall installation a breeze. You’ll transform your retail space into a super organized and attractive place to show off your goods!
Ready to Get Started? Shop Slatwall Panels Now
Step-by-Step Installation Guide
Putting up slatwall might seem like a big job, but with a clear plan and following these steps, it’s actually pretty straightforward. You’ll be amazed at how much better your store looks! Here’s how to do it right:
1. Plan and Measure Everything
Getting your measurements and planning just right is super important for a good slatwall installation. If you rush this part, you might end up with mistakes that are a pain to fix. So, take your time, look at your space, and imagine how you want it to look when it’s done.
Measure Your Walls: Grab your measuring tape and find out how tall and wide the wall area is where you want to put the slatwall. Measure in a few different spots, because walls aren’t always perfectly straight. Write down all your measurements carefully.
Figure Out How Many Panels You Need: Once you have your wall measurements and know the size of the DISPLAYARAMA slatwall panels you’re using, calculate how many panels you’ll need. It’s smart to get a little extra, just in case you need to make some cuts or if there are any odd spots on the wall. Better safe than sorry, especially if this is your first time!
Plan Your Layout: Think about how the panels will sit on the wall. Will they go all the way from the floor to the ceiling, or just cover a certain part? Consider where the panels will meet and how they’ll look next to things like windows or other store fixtures. A good plan means fewer cuts and a nicer, more put-together look.
Spot Any Obstacles: Walk along the wall and look for anything that might get in the way, like electrical outlets, light switches, windows, or doors. Mark exactly where these are on the wall. You’ll need to cut your slatwall panels to fit around these, so knowing their exact spots is key. For outlets and switches, make sure your cuts are neat enough so the covers can go back on smoothly.
Think About Weight: If you’re planning to hang heavy items, consider how much weight your slatwall and your wall can handle. The best way to make sure your slatwall is super strong is to screw it directly into the wall studs (those vertical wooden beams inside your walls). Use your stud finder to locate and mark all the studs in your installation area. If you can’t find studs, or they’re too far apart, you might need to use special wall anchors or add horizontal wooden strips (called furring strips) to give you a solid base.
Draw It Out: It’s a really good idea to sketch your slatwall plan on paper. Write down all your measurements, where each panel goes, and where any obstacles are. This drawing will be your map during installation and help you spot any potential problems early.
By taking your time to plan and measure carefully, you’re setting yourself up for an easy and good-looking slatwall installation that will work great in your store for years!
2. Get Your Wall Ready
Once you’ve done all your planning and measuring, the next big step is to get your wall ready. A well-prepared wall means your slatwall will go up securely and stay put for a long time, avoiding problems like panels that don’t sit right.
Clean the Wall: Start by giving your wall a good cleaning. Dust, dirt, grease, or anything else on the wall can stop your slatwall panels from sticking properly. Use a damp cloth or a gentle cleaner to wipe down the whole area where the slatwall will go. Make sure the wall is completely dry before you do anything else.
Clear Out Obstacles: If there are any old nails, screws, or fixtures on the wall that will be covered by the slatwall, take them out. You want the wall surface to be as smooth and flat as possible. Even tiny bumps can make your slatwall panels look uneven.
Mark Where Your Studs Are: Use your stud finder again to double-check and clearly mark the middle of each wall stud. These marks are super important because they show you where to screw in your slatwall panels for the strongest hold. It’s a good idea to draw a light line all the way down each stud so you hit the center when you drill. If you’re putting slatwall on drywall without studs, mark where you’ll be putting your anchors.
Draw a Level Line: Get your level and measuring tape and draw a perfectly straight, horizontal line on the wall. This line should be where the bottom edge of your first slatwall panel will sit. This is probably the most important mark you’ll make, because if this first panel isn’t level, your whole installation will be crooked. So, take your time and make sure this line is spot on.
Think About Adding Support Strips (Optional, but Good for Heavy Stuff or Bumpy Walls): For extra strength, especially if you’re hanging heavy items or if your wall isn’t perfectly flat, you might want to add horizontal wooden strips (called furring strips) to your wall studs. These are usually thin pieces of wood that you screw into the studs first. Then, you screw your slatwall panels into these strips. This method gives you a super flat and strong surface, spreads out the weight better, and creates a small gap behind the slatwall, which can be helpful. If you use these strips, make sure they are level and straight before you attach the slatwall.
By getting your wall ready with care, you’re building a strong and clean base for your slatwall. This means your retail display will not only look great but also be super sturdy and last a long time.
3. Cutting Slatwall Panels (if you need to)
Even though DISPLAYARAMA has lots of slatwall panel sizes, you’ll often need to cut them to fit your exact space, go around things like outlets, or create a special look. Cutting slatwall correctly is key to making it look professional. And always, always be safe when using power tools!
Measure Twice, Cut Once: This old saying is super true when you’re cutting slatwall. Double-check your measurements against your plan and the actual wall. Use a pencil and a straight edge to clearly mark where you’re going to cut. For really straight cuts, a carpenter’s square can help make sure your lines are perfect.
Pick the Right Saw and Blade: The saw and blade you use make a big difference in how clean your cut is. For straight cuts, a circular saw with a fine-tooth blade (made for cutting things like laminate or plywood) is usually best. This kind of blade helps stop the panel from chipping. For tricky cuts, like around outlets or switches, a jigsaw with a fine blade works better. Make sure your blades are sharp so you get smooth cuts and don’t splinter the material.
Support Your Panel: When you’re cutting, make sure the slatwall panel is held up well. You don’t want it to sag or shake, which can lead to bad cuts. Use sawhorses or a strong workbench, and clamp the panel down tight. If you’re cutting a long panel, have someone help you hold the end that’s not supported so it doesn’t break or bend.
Cut Face Down (for circular saw): If you’re using a circular saw, it’s usually best to cut the slatwall panel with the good side facing down. This helps prevent chipping on the part of the panel that will show, because the saw blade enters from the top and exits from the bottom. The cleanest cut will be on the side that faces up when you install it.
Go Slow and Steady: Don’t rush your cuts. Guide the saw slowly and smoothly along your marked line. Pushing too hard or going too fast can make the blade get stuck, leading to a rough cut or even damaging the panel. Let the saw do the work.
Make Holes for Outlets and Stuff: For outlets, switches, or other things on the wall, carefully measure and mark exactly where you need to cut on the slatwall panel. Use a drill to make small holes in the corners of your cutout, then use a jigsaw to carefully cut along your marked lines. Take your time with these cuts to make sure they fit perfectly around the obstacle.
Smooth the Edges (Optional): After cutting, you might want to lightly sand or file the cut edges to get rid of any small rough spots. This will make your installation look even more finished and prevent anything from snagging.
By following these tips, you can easily cut your DISPLAYARAMA slatwall panels to fit your store perfectly, giving you a custom and professional-looking setup.

4. Putting Up the First Panel
Getting your first slatwall panel up is a really important step because it sets the stage for everything else. You need to be super precise here to make sure all the other panels line up perfectly and your whole display looks straight and nice.
Start in a Bottom Corner: It’s usually best to begin your slatwall installation in one of the bottom corners of your wall. This gives you a solid starting point and lets you work your way up and across the wall in an organized way. If you have a special design in mind that means starting somewhere else, just make sure you have a clear, straight line to guide you.
Line It Up with Your Mark: Carefully pick up the first slatwall panel and line up its bottom edge with that horizontal line you drew on the wall earlier. Use your level to make sure the panel is perfectly straight. Seriously, this step is super important! If this first panel isn’t level, all the panels you put up after it will be off, and your whole display will look crooked.
Find Studs and Drill Holes: Once the panel is perfectly lined up and level, use your stud finder (or check your marked stud locations) to see where the studs are behind the panel. Mark these spots on the slatwall panel. Then, use a drill bit that’s a little smaller than your screws to drill pilot holes through the slatwall panel at each marked stud spot. This stops the slatwall from splitting and makes it easier to drive in the screws.
Attach the First Panel: Drive screws through the holes you just drilled in the slatwall panel and into the wall studs. Make sure you use screws that are right for your wall material and long enough to go firmly into the stud. Don’t screw them in too tight, though, because that can damage the slatwall or make it bend. The screws should be snug, holding the panel firmly against the wall. For extra security and to keep the panel from moving, you can put screws in the top and bottom grooves, as well as in the middle of the panel, making sure they hit the studs.
Check for Straightness: After you’ve attached the first panel, take a moment to check it again with your level. Make sure it’s straight both horizontally and vertically. Fix any small issues now before you move on. A well-installed first panel makes the rest of the job much, much easier and ensures your display looks professional.
Think About Glue (Optional): For an even stronger hold, especially in busy areas or if you’ll be hanging heavy things, some people like to put construction adhesive on the back of the slatwall panels before screwing them in. If you do this, make sure the glue works with your wall and slatwall materials, and follow the glue’s instructions for how to apply it and how long it takes to dry. This can make your display even more solid and stop it from wiggling over time.
With your first slatwall panel securely and accurately in place, you’ve got a great start for a strong and good-looking retail display. The panels you add next will build on this, turning your wall into an awesome place to show off your products.
5. Putting Up More Panels
Once your first slatwall panel is up and secure, adding the rest of them gets much easier. You’re just building on what you’ve already started. The main thing is to keep everything lined up and attached firmly so your display looks smooth and strong.
Connecting the Panels: Slatwall panels are made to fit together. The top edge of one panel slides right into the groove of the panel below it. Carefully lift the next panel and tilt it a bit so its bottom lip slides into the top groove of the panel you just put up. Gently lower it until it sits snugly and locks into place. This interlocking design helps spread out the weight and makes your wall look like one continuous piece.
Make Sure Seams Are Tight: As you connect each new panel, try to make the seams between them as tight and flush as possible. Any gaps will stand out and make your slatwall look less professional. You might need to gently tap the panel into place with a rubber mallet (use a piece of scrap wood to protect the slatwall surface) to get a really snug fit.
Keep Checking for Straightness: Even though the panels connect, it’s super important to keep checking if they’re level (horizontal) and plumb (vertical) as you add each new section. Use your level often, both across and up and down, to make sure the panels aren’t getting out of line. Even small mistakes can add up quickly and make your whole display look crooked.
Find Studs and Screw Them In: Just like with the first panel, find the wall studs behind each new slatwall panel. Mark these spots and drill pilot holes through the panel. Then, screw through these holes into the studs. Keep using the right screws and don’t screw them in too tight. For a cleaner look, many people put the screws inside the slatwall grooves, so they’re less noticeable once you add accessories.
Using Connectors (if you need them): If your wall is wider than one panel and you need to put panels side-by-side, you’ll use connectors to join them. These usually slide into the vertical edges of the panels, making a smooth connection. Make sure the connectors are flush and secure, so your wall looks continuous.
Working Around Obstacles: As you keep going, you’ll run into those obstacles you marked earlier (outlets, switches, windows, etc.). Carefully measure and cut each panel to fit perfectly around these. Remember to leave enough room for outlet covers or trim to go back on smoothly. Taking your time and cutting precisely here will make a big difference in how professional your finished wall looks.
Tips for the Top Panel: When you get to the top of your wall, you might need to cut the last panel to fit the remaining height. Measure the exact distance from the top of the last full panel to the ceiling or where you want your slatwall to end. Cut the top panel to this size, making sure the edge is clean and straight. Screw this final panel into the studs, paying close attention to its top edge for a neat finish.
By carefully putting up each panel, keeping everything straight, and paying attention to the details, you’ll build a strong and good-looking slatwall display that’s ready to show off your products like a pro.
6. Adding the Finishing Touches and Trim
Once all your slatwall panels are securely in place, the last step in putting them up is to add the trim and finishing pieces. These bits not only make your slatwall look super polished and professional, but they also help protect the edges and hide any little imperfections from your cuts.
Different Kinds of Trim: DISPLAYARAMA has different types of trim made just for slatwall:
•Edge Pieces (J-Trim or U-Trim): These go on the exposed vertical edges of your slatwall panels, giving them a clean, finished look. They usually just slide right over the edge.
•Top and Bottom Trim: These pieces cap off the top and bottom edges of your slatwall, making a nice smooth transition to the ceiling or floor.
•Corner Trim: If your slatwall goes around an inside or outside corner, special corner trim pieces help it look seamless and professional.
Measuring and Cutting Trim: Just like with your slatwall panels, measure your trim pieces carefully before you cut them. Use a miter saw or a miter box with a hand saw to make precise angled cuts (45 degrees) for corners. This helps them fit together perfectly. For straight sections, just cut the trim to the right length.
Attaching the Trim: You can usually attach trim with small finishing nails, screws, or even construction glue. If you’re using nails or screws, make sure they’re small enough not to damage the slatwall and that you sink their heads in so they’re flush. If you’re using glue, put a thin line on the back of the trim and press it firmly into place. Always follow the glue maker’s instructions for how to apply it and how long it takes to dry.
Hiding Screws (Optional): For an even cleaner look, you can use screw caps that match the color of your slatwall or wood filler to cover up any exposed screw heads. If you use wood filler, make sure it can be painted and sanded smooth once it’s dry.
Clean Up: After all the trim is on, give your new slatwall a final wipe-down. Get rid of any dust, fingerprints, or glue residue. This will make sure your display looks perfect and ready for your products.
By taking the time to add these finishing touches, you’ll make your slatwall installation go from just functional to truly professional. It’ll create a welcoming and attractive background for all your products.
7. Putting Up Your Accessories
Now that your slatwall panels are all set up and looking great, here comes the fun part: turning your plain wall into an awesome display by adding all your accessories! This is where you really see how versatile slatwall is, letting you customize your display to perfectly show off your products.
What Kind of Slatwall Accessories Are There? DISPLAYARAMA has a huge selection of slatwall accessories for just about anything you want to display. These include:
•Hooks: You can get these in different lengths and styles (like single, double, or waterfall hooks). They’re perfect for hanging packaged goods, clothes, or even tools.
•Shelves: We have flat shelves, gondola shelves, and special ones (like shoe shelves or holders for brochures). These give you surfaces to display folded items, boxed products, or decorative stuff.
•Bins and Baskets: Great for keeping smaller items organized, or for impulse buys and bulk products.
•Faceouts and Hangrails: These are designed for hanging clothes, so garments can face forward or hang on hangers.
•Sign Holders: Super important for showing prices, product info, or special promotions.
Super Easy to Install: The best thing about slatwall accessories is how simple they are to put up. Most of them just slide right into the horizontal grooves of the slatwall panels. No tools, no screws, no complicated hardware needed! This means you can quickly and easily change your displays whenever your inventory changes or you have new sales.
Smart Placement: Think about how people walk through your store and what they see first when you’re placing accessories. Try to group related products together, and make sure things are displayed at a height that’s easy for customers to reach. Use different heights and depths of accessories to make your display more interesting and draw customers’ eyes to your most important products.
Spread Out the Weight: Slatwall is super strong, but it’s still a good idea to spread out the weight evenly across the panels. Try not to overload just one hook or shelf, especially if you’re displaying heavy items. For heavier products, use multiple hooks or shelves to keep everything stable and prevent any damage to your slatwall or accessories.
Change Things Up Regularly: One of the biggest perks of slatwall is how adaptable it is. Don’t be afraid to try out different ways to arrange your accessories and products. Changing your displays regularly keeps your store looking fresh, highlights new merchandise, and helps you respond to what your customers are buying. This active approach to displaying products can really boost your sales and make shopping a better experience for everyone.
Looking to Get More Slatwall? Call 1-800-292-5227
Need Accessories for Your Slatwall Panels? Shop All Accessories
Pro Tips and Common Mistakes to Avoid
Even though our step-by-step guide gives you a great start for installing slatwall, knowing a few pro tips and what common mistakes to avoid can make your project even better. Steering clear of these slip-ups will save you time, effort, and headaches, making sure your finished slatwall looks truly professional.
Pro Tips for a Perfect Finish:
•Use a Laser Level: For big installations, a laser level can be a lifesaver. It shines a perfectly straight line across your whole wall, making it much easier to line up panels quickly and accurately, especially if you’re working alone.
•Put Parts Together First (if you can): If you have several panels that will go next to each other, and you have enough space, try putting them together on the floor first. This lets you make sure they line up perfectly and the seams are tight before you lift them onto the wall. Then you can install bigger sections all at once.
•Start with a Full Panel: Whenever possible, begin your installation with a full, uncut panel. This gives you a strong, stable starting point and means you’ll have fewer tricky cuts to make at the beginning.
•Use a Router for Holes: For the neatest and most precise holes around outlets, switches, or other wall features, think about using a router with a special bit called a flush trim bit. This gives you a much cleaner edge than a jigsaw, especially on laminated surfaces.
•Think About Lighting: Plan your store’s lighting along with your slatwall. Good lighting can really make your products and the slatwall pop, making your displays look even better. Try to avoid shadows that hide your products.
•Let Your Panels Get Used to the Room: If your slatwall panels have been stored somewhere with a very different temperature or humidity than your store, let them sit in your store for at least a day or two before you install them. This helps stop them from warping or changing size after they’re installed.
•Check Things Regularly: Once your slatwall is up, every now and then, check for any loose screws or accessories. A quick tighten can prevent problems down the road and help your display last longer.
Common Mistakes to Steer Clear Of:
•Not Planning Enough: Rushing through the planning and measuring part is the most common mistake people make. If your measurements are off or you don’t think about obstacles, you’ll end up frustrated and having to redo work. Always measure twice, cut once, and draw out your plan.
•Ignoring Wall Studs: Just using drywall anchors for heavy items can cause your slatwall to pull away from the wall. Always try to screw your slatwall panels into the wall studs for the best support and to hold the most weight. If there aren’t any studs, use strong, heavy-duty anchors or think about adding wooden support strips.
•Not Making the First Panel Level: Like we said, the first panel sets the tone for the whole installation. If it’s not perfectly level, every panel after it will be off, and your display will look crooked and unprofessional. Take extra time to make sure your first panel is absolutely level.
•Screwing Too Tight: If you screw too tightly, you can strip the screw holes, damage the slatwall material, or make the panel bend. Screws should be snug, holding the panel firmly without squishing it.
•Not Thinking About Temperature Changes: While it’s less common with modern slatwall, big changes in temperature or humidity can make materials expand or shrink. Leaving a tiny gap (about 1/16th of an inch) at the edges, especially on very long walls, can stop it from buckling.
•Using the Wrong Tools or Blades: Using dull blades or the wrong kind of saw can lead to chipped edges, splintering, and a messy finish. Invest in the right tools and sharp blades for clean, professional cuts.
•Forgetting Safety Gear: Power tools and cutting materials can be dangerous. Always wear safety glasses, gloves, and a dust mask. Putting safety first protects you and helps your installation go smoothly.
Want to Get Bulk Pricing on Your Slatwall? Call Now
Why Buy Slatwall from DISPLAYARAMA?
When you’re picking out stuff for your retail store, like display solutions that look good and last a long time, who you buy from is just as important as what you buy. For over forty years, DISPLAYARAMA has been the trusted friend for tons of businesses, from small shops to big stores. We’ve been providing awesome slatwall panels and store fixtures that really last and make shopping a better experience.
Our 40+ years in the business isn’t just a number; it means we’ve got tons of experience, we’re always coming up with new ideas, and we’re super dedicated to making our customers happy. We’ve seen how retail displays have changed over the years, and we’ve always made sure our products keep up with what’s new and popular. All this experience means we really get what stores need, and we make products that aren’t just useful but also help you sell more and make your brand look great.
At DISPLAYARAMA, we’re really proud of how good our quality is, how many different options we have, and how affordable our prices are for our slatwall panels and store fixtures. We pick the best materials and follow strict rules when we make everything, so every panel is super strong and looks perfect. Our slatwall is built to handle the daily hustle and bustle of a busy store, staying looking new for years. This means you won’t have to keep replacing or fixing your displays, which saves you money in the long run. Plus, we have a huge catalog with lots of colors, finishes, and sizes, so you’ll definitely find the perfect slatwall to match your store’s style and brand. Even with our top-notch quality, we try to keep our prices low, so you get amazing value without giving up on performance.
We know that every business is different, so DISPLAYARAMA also offers special prices for bulk orders and custom solutions. Whether you’re setting up a brand new store, redoing a whole chain of stores, or need a special display for a unique product, we can handle it. Our team can work with you to create custom slatwall setups, making sure your displays are perfectly made for your space and what you want to show off. Our bulk pricing makes it easy and affordable to get all the displays you need, saving you a lot of money on bigger orders.
Choosing DISPLAYARAMA means you’re not just buying slatwall; you’re teaming up with a company that understands your business and wants you to succeed. We’re all about great products, fair prices, and amazing customer service. Let us help you turn your store into a super organized, good-looking, and ultimately more profitable place!
Looking for High Quality Slatwall Panels? Shop Slatwall Now
- Price range: $54.50 through $329.00 Select options This product has multiple variants. The options may be chosen on the product page
- Price range: $64.50 through $339.00 Select options This product has multiple variants. The options may be chosen on the product page
- Price range: $64.50 through $339.00 Select options This product has multiple variants. The options may be chosen on the product page
- Price range: $64.50 through $339.00 Select options This product has multiple variants. The options may be chosen on the product page
- Price range: $54.50 through $339.00 Select options This product has multiple variants. The options may be chosen on the product page
- Price range: $64.50 through $339.00 Select options This product has multiple variants. The options may be chosen on the product page
- Price range: $64.50 through $339.00 Select options This product has multiple variants. The options may be chosen on the product page
- Price range: $54.50 through $329.00 Select options This product has multiple variants. The options may be chosen on the product page
- Price range: $54.50 through $329.00 Select options This product has multiple variants. The options may be chosen on the product page
- Price range: $64.50 through $329.00 Select options This product has multiple variants. The options may be chosen on the product page
- Price range: $54.50 through $329.00 Select options This product has multiple variants. The options may be chosen on the product page